


%20(1).png)
AutoBlogger v2 - Form Input - AI Img
- Easy setup, zero coding, plug & play file
- Runs on autopilot using ChatGPT
- Fully customizable and adjustable

Bot setup guide
Includes a duplicatable bot template and an exact step-by-step setup guide to get the bot running.
Create an account by clicking here.
You can access the Bot by
click here
and follow the instructions provided in the tutorial below.
There are four variations to the auto-blogger.
We’ll go over each one, and their slight differences, here.
AutoBlogger v2 - Topic Randomizer - No Img
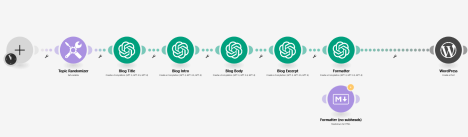
The simplest of the auto-bloggers.
If you click on the clock icon in the first empty module, you can set this scenario on a schedule, so it runs automatically at predetermined intervals.
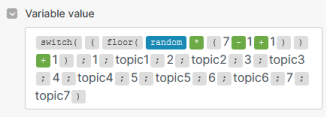
The next module rotates through pre-defined topics. You simply need to replace the placeholders with your topics. There are currently seven spaces for topics. You can add or subtract more or less. Just make sure in the formula, the larger number is the TOTAL number of topics, and then each topic follows this format -
semi-colon > number > semi-colon > topic
And close it off with the closing parenthesis at the end.
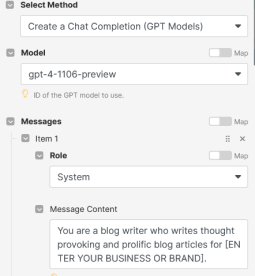
The next few modules are GPT modules. You’ll need to connect your OpenAI account with these (by clicking “Add” next to connection).
After you connect your account everything will prepopulate, but you must edit the System Prompt in each module to reflect your business or brand information -
Also, feel free to edit the prompts in whatever way best suits your needs. Then there is a Formatter No Subheads module that isn’t connected to the others (with is that?!)

This is a module that will format the text to HTML. Currently the scenario relies on the GPT “Formatter” module, BUT….sometimes GPT can get confused and destroy the output, or sometimes it uses too many tokens. There are many reasons why you’d want to use a non-gpt module for formatting. The only difference is, the non-gpt formatter will not include h2 subheads.
If you want to use this, just switch it out for the GPT formatter module (and change the variable output in the Wordpress module.
The last module is Wordpress. You do not have to use Wordpress, and you can change this out for any supported CMS platform (Medium, Webflow, Blogger, etc are options).
If you use Wordpress, you need to connect your Wordpress site. It is a little more complex than other integrations. Full details are here under the “Connecting Wordpress to Make” heading - https://www.make.com/en/help/app/wordpress
Once connected, this scenario will post a blog article with title, article body, and Google excerpt to Wordpress in DRAFT mode. Be sure to check it for edits before publishing.
AutoBlogger v2 - Form Input - No Img
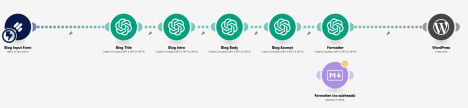
You’ll notice that this scenario is nearly identical to the last one. The ONLY difference is the input. Rather than run on a schedule, and then randomly rotate through topics, this one relies on a form input.
The idea here is, you fill out a simple quick form with your topic or thoughts, and THEN the scenario will write your article.
Here’s how you set that up. It requires a (free) Jotform account (CLICK HERE). Once you have a Jotform account, you can create a form (it’s really easy). We recommend doing this in one of two ways -
Either simply have a short text input and ask for a topic
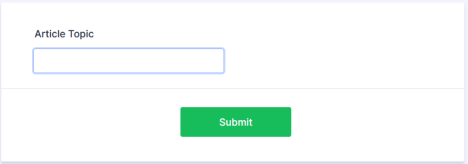
OR
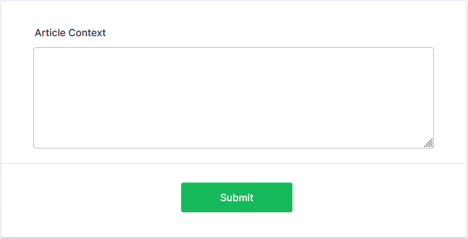
Have a long text input and ask for fuller context
Once you have the form, then you need to connect it to your scenario.
You do this by clicking Add, and then Make will create a webhook. Simply name your webhook and then tell it which form you want it connected to and that’s it.
*PROTIP, you need to run the Jotform module first before any output can be used as a variable in other modules. So, disconnect Jotform from all other modules and then click run. Then fill out your form (go to the Publish page and just open it in a new window) and click Submit. This will trigger the module. Then when you reconnect it, you’ll see your answers as variables.
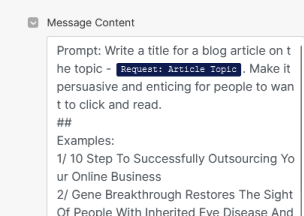
The default prompt is set to use a TOPIC. If you choose to use fuller context, you need to remember to edit the prompts.
Why would you use full context? This gives you the ability to tell the A.I. more about what you want to write. So, rather than just say “write me an article about super-cars” you could type in a full paragraph about an article you read on a new type of super-car and then send the A.I. that.
The rest of the scenario is exactly like the previous scenario.
AutoBlogger v2 - Form Input - Stock Img

This scenario is identical to the previous one, but with a slight difference in that it also injects a featured image into the blog post. This one uses Unsplash to find and inject a stock photo.
This scenario requires a (free) Unsplash account. You’ll also need to connect that account to Make. Instructions are here - CLICK HERE
While it isn’t required, this scenario ALSO overlays the blog title onto the image using a service called Cloudinary (also free). Doing this you can also add branded elements to the overlay (like your logo for example).
Connect your Cloudinary account to Make here - CLICK HERE
This scenario simply uploads the image to Cloudinary then overlays some branded elements (like corners and the logo) and the blog title name. That is handled through the “Overlay Title to Image” module and specifically in this URL suffix -

Backdrop3 and brand-overlay3 are both images that have previously been added to our Cloudinary account. This URL string references them to overlay them, then takes the GPT title and overlays that.
You can modify this by changing the image names with images you have uploaded to your account, removing them altogether, changing the font parameters (size, position, color, etc).
Learn more about image transformations here -
*Note - if any of the GPT output has special characters in it, it may “break” the URL. Be aware of this.
Then the transformed image is uploaded to Make and injected into Wordpress through a media upload.
The rest of the scenario is like the previous ones.
AutoBlogger v2 - Form Input - A.I. Img
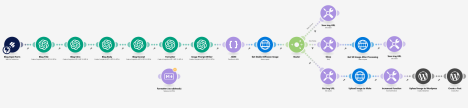
This bot is mostly identical to previous bots except that it adds a GPT module for creating a text-to-image prompt AND adds api calls to ModelsLab.com.
You will need a ModelsLab (formerly stablediffusionapi.com) account for this (CLICK HERE)
All parameters are already filled out, you simply need to input your API keys.

For more information on how to manipulate your images in stablediffusionapi’s API, check out their API docs -
As you can see, these bots start simple but can get more complex.
You can also customize them by customizing the AI prompts, customizing the inputs (the form, for example), or customizing where the output goes.
These scenarios are yours to edit and shape into your own. They serve mainly as guideposts to get most of the confusing code parts out of the way.
Automate the bots effortlessly with our user-friendly platform and unlock the power of AI-driven efficiency in just a few simple steps!
To maximize the performance and engagement of this bot, it is crucial to tailor the ChatGPT prompts to your unique business context.
Don't miss out on the incredible opportunities that await - launch your bot now and experience the game-changing benefits of AI firsthand!
Integrate with your daily tools
Make it personal, make it yours

.png)